Finale Workflow Documentation
2023-02-08 - ~3 Minutes
Mackenzie, my daughter, and I created this post documenting my wife’s Finale workflow for scanning and editing music on her Mac. We did this for my wife to celebrate her birthday preserve her sanity. Well, it was worth a shot. The birthday idea seemed more romantic, but mental health comes first.
The document was created using a process we recently built and documented in Creating Better Documentation . In this instance of the process we tried to annotate in yellow screen capture elements that need attention, and used red annotation to indicate things that require input or action of some kind. In some of the later images we failed and things that should be red were left highlighted in yellow. Sorry.
Begin by Scanning
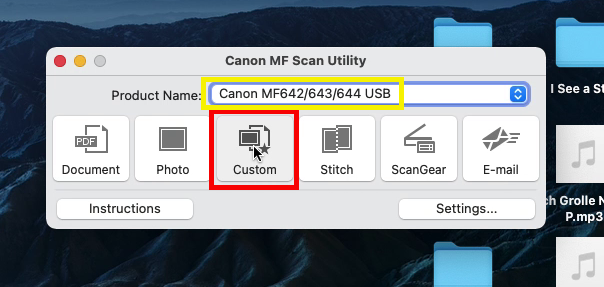
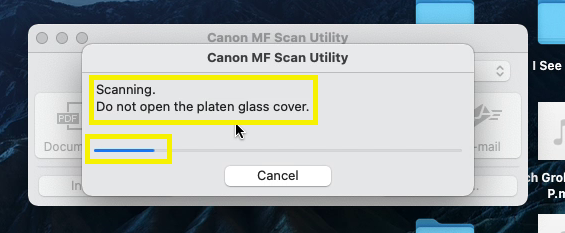
The first step involved launching the Canon MF Scan Utility as you see below. This is the software she uses to scan music pages on the multi-function scanner attached to her Mac.
 We verified that the correct scanner is selected, loaded the score into the scanner*, and clicked
 Custom to begin the scan. Then, wait for the scanner to warm up, if necessary.
*Note that the sheet music can be placed on the scanner glass one-sheet-at-a-time, or if the pages are 8.5x11, one-sided, and in good condition, they may be loaded in the document feeder to scan continuously. In this particular case we were able to use the document feeder.
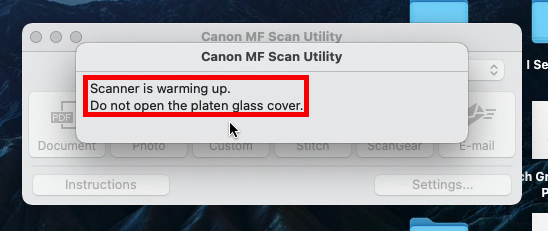 Once the scanner is ready the mechanical process of scanning should begin. When scanning one-page-at-a-time some user intervention will be required.
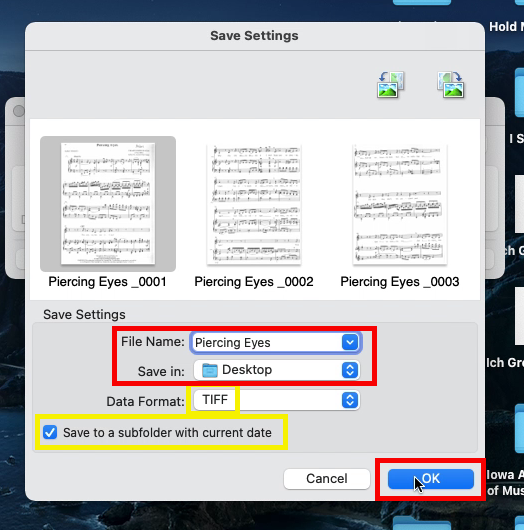
 When the scan is complete a
 Save Settings window should pop-up. We reviewed the information and made appropriate selections where noted below, then clicked OK to continue. Be sure to set and take note of the File Name: and Save in: fields! Also, it’s probably wise to ensure that the Data Format: is “TIFF” and the Save to a subfolder with current date control is checked.
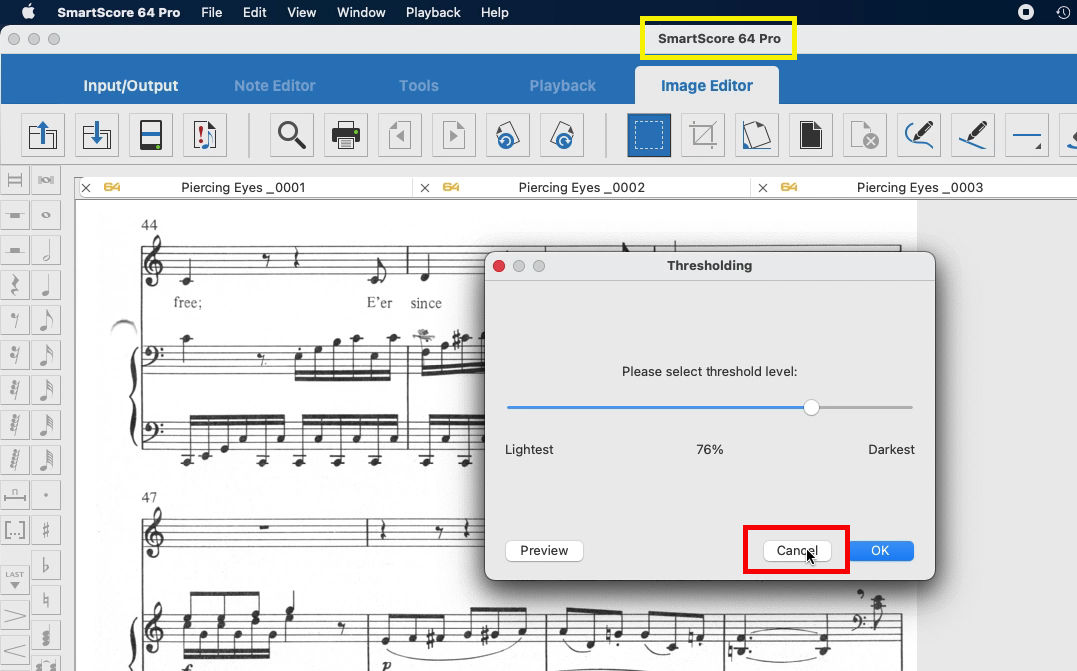
SmartScore 64 Pro
A SmartScore 64 Pro window will automatically open, but don’t be confused, we don’t want to run this application yet! Click the Cancel button to close SmartScore 64 Pro.
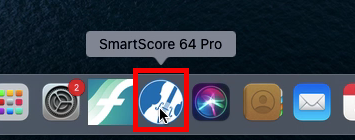
 Once SmartScore 64 Pro is closed, we need to open it properly by clicking its icon in the dock. :frowning:
 Now SmartScore is open to the
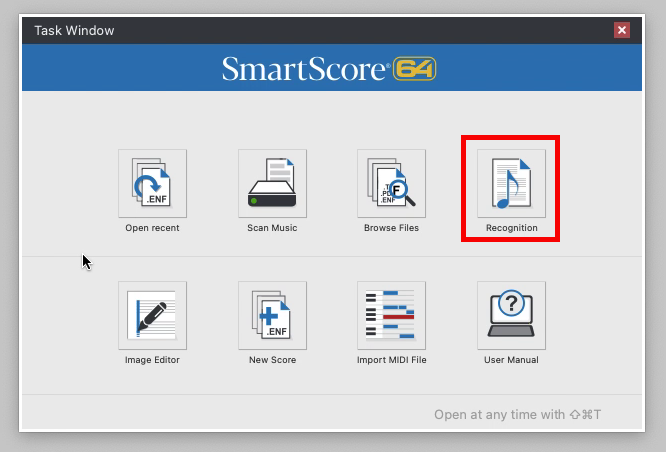
 Task Window where we selected Recognition to convert the scanned images to music XML.
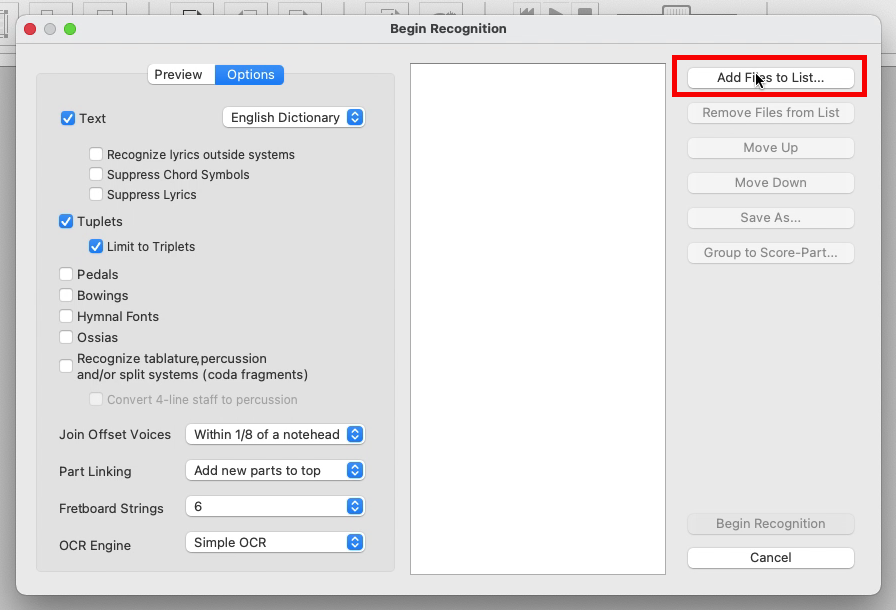
 Next, we add the files of our scanned pages to the recognition processing list.
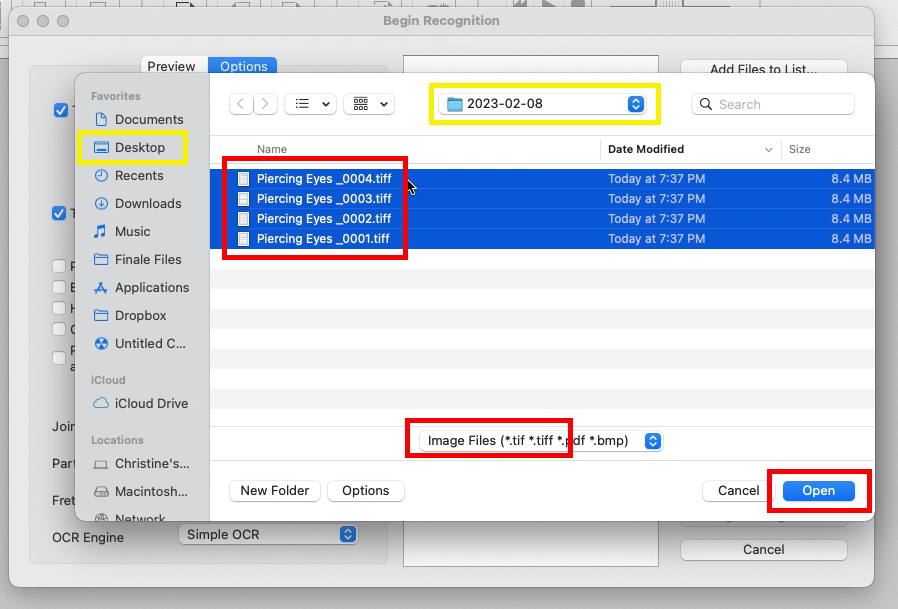
 In the file dialog we navigate to the scanned page TIFFs and select them all. The order of files in the selection is NOT critical. With all files selected click
 Open.
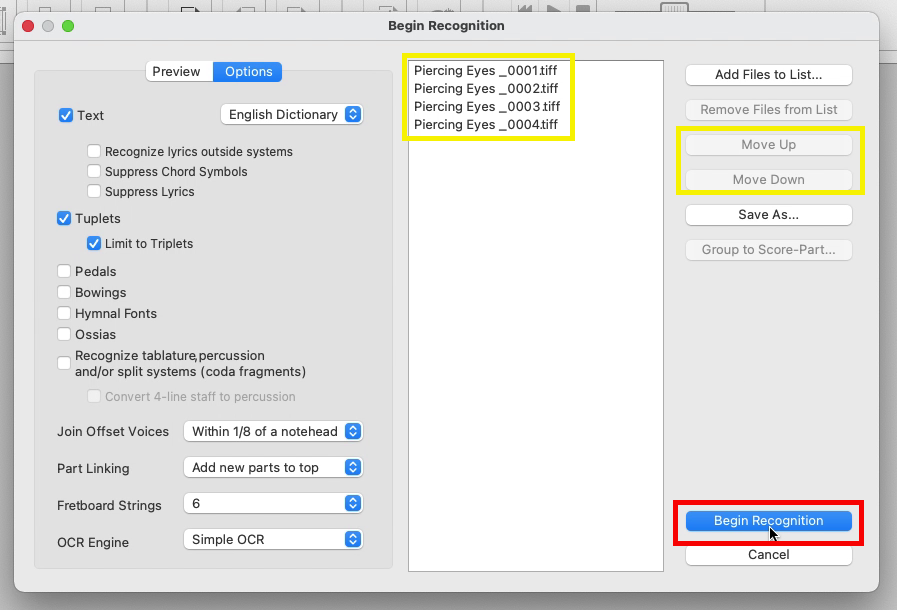
 The next
 Begin Recognition screen offers controls to change the file order if necessary. Once the files are in the proper order click Begin Recognition button to proceed.
 Be patient, the recognition process may take a few minutes.
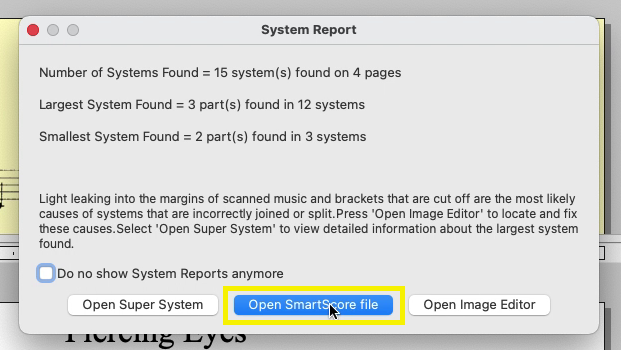
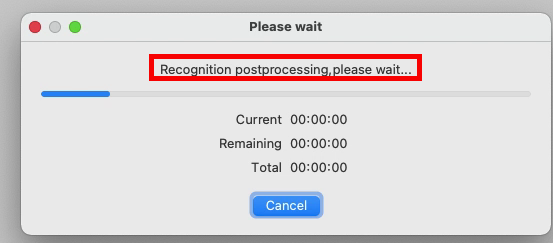 When the recognition is complete a
 System Report appeared prompting us to Open SmartScore file. We did.
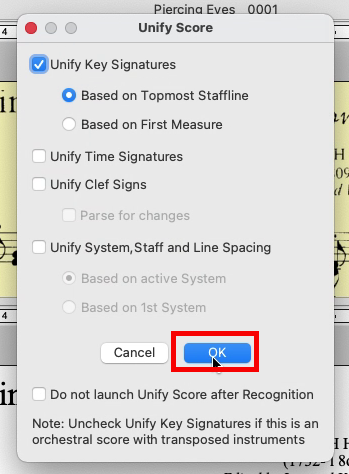
 Next, the
 Unify Score window popped up and we verified the default selections shown below before clicking OK.
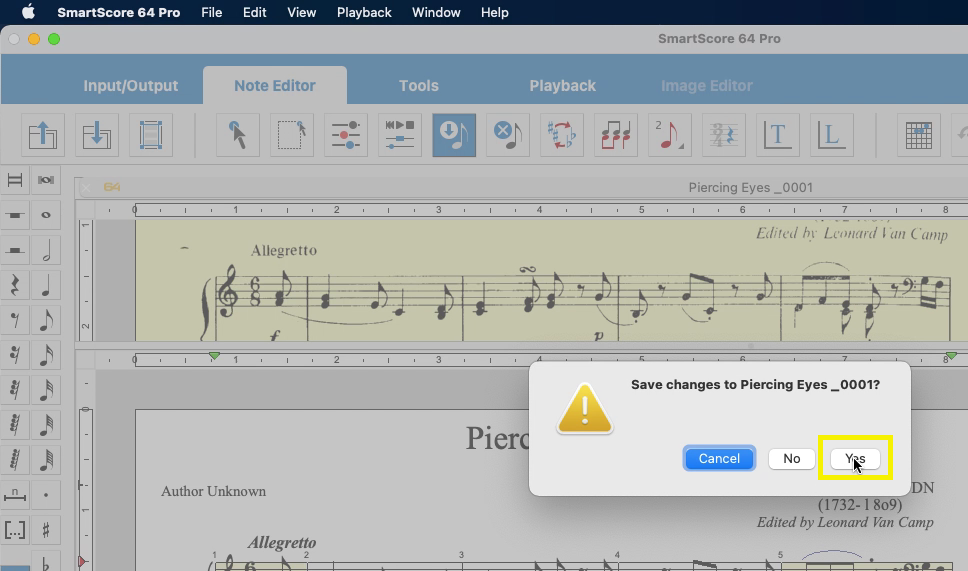
 When prompted to save the score be sure to select
 Music XML (*.xml) and take note of where the file will be saved.
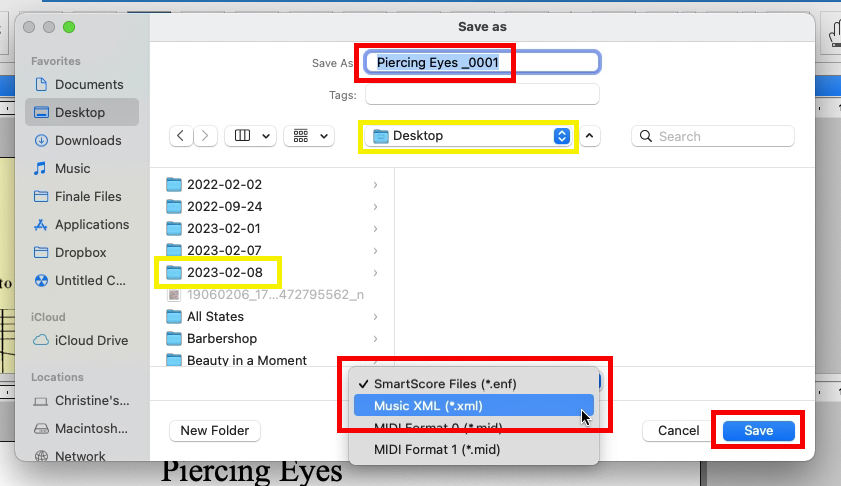 You may be prompted to save each scan/file individually. Once the file save is confirmed you can close SmartScore 64 Pro.
Finale
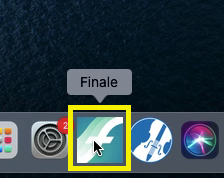
Next, open Finale from the dock as shown below.
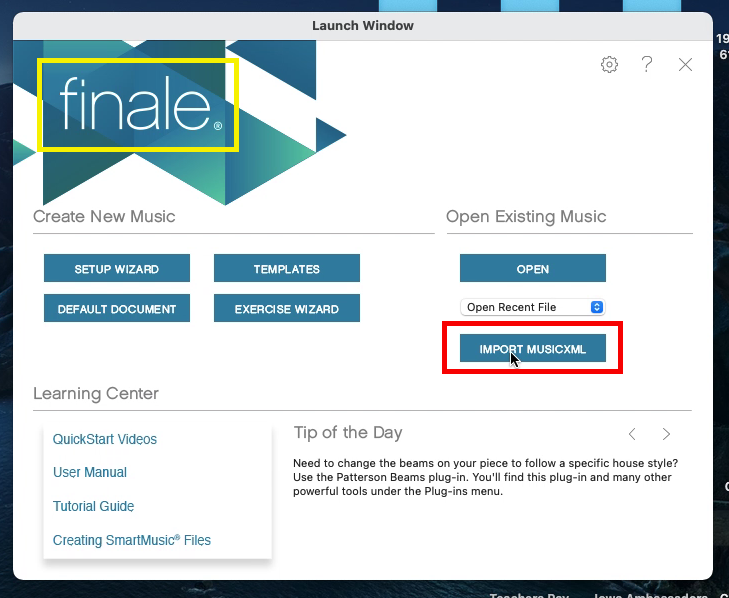
 After a minute or more the Finale
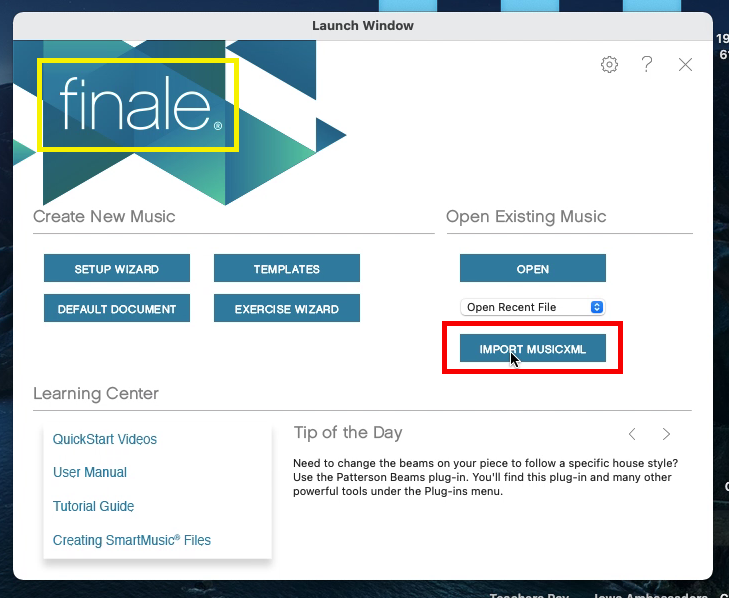
Launch Window should appear, and we selected IMPORT MUSICXML as shown below.
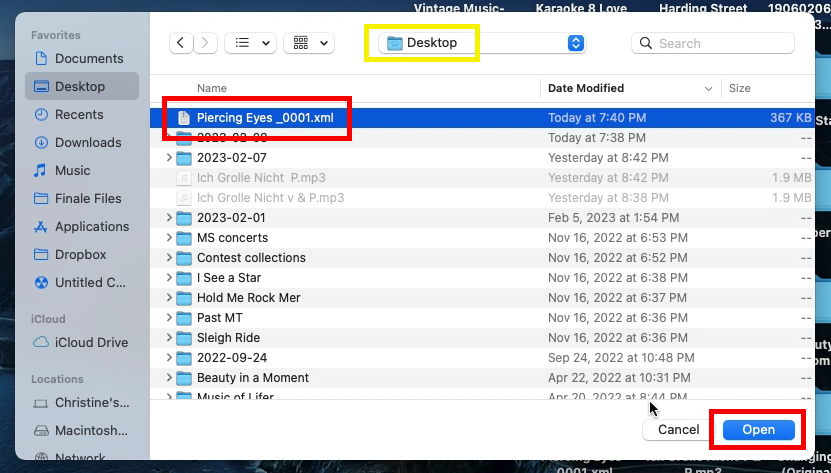
 We navigated to the XML file that was saved in SmartScore and clicked
 Open to load it in Finale.
 That’s it, the scanned score is now loaded in Finale where it is ready to be edited! It’s a good idea to click
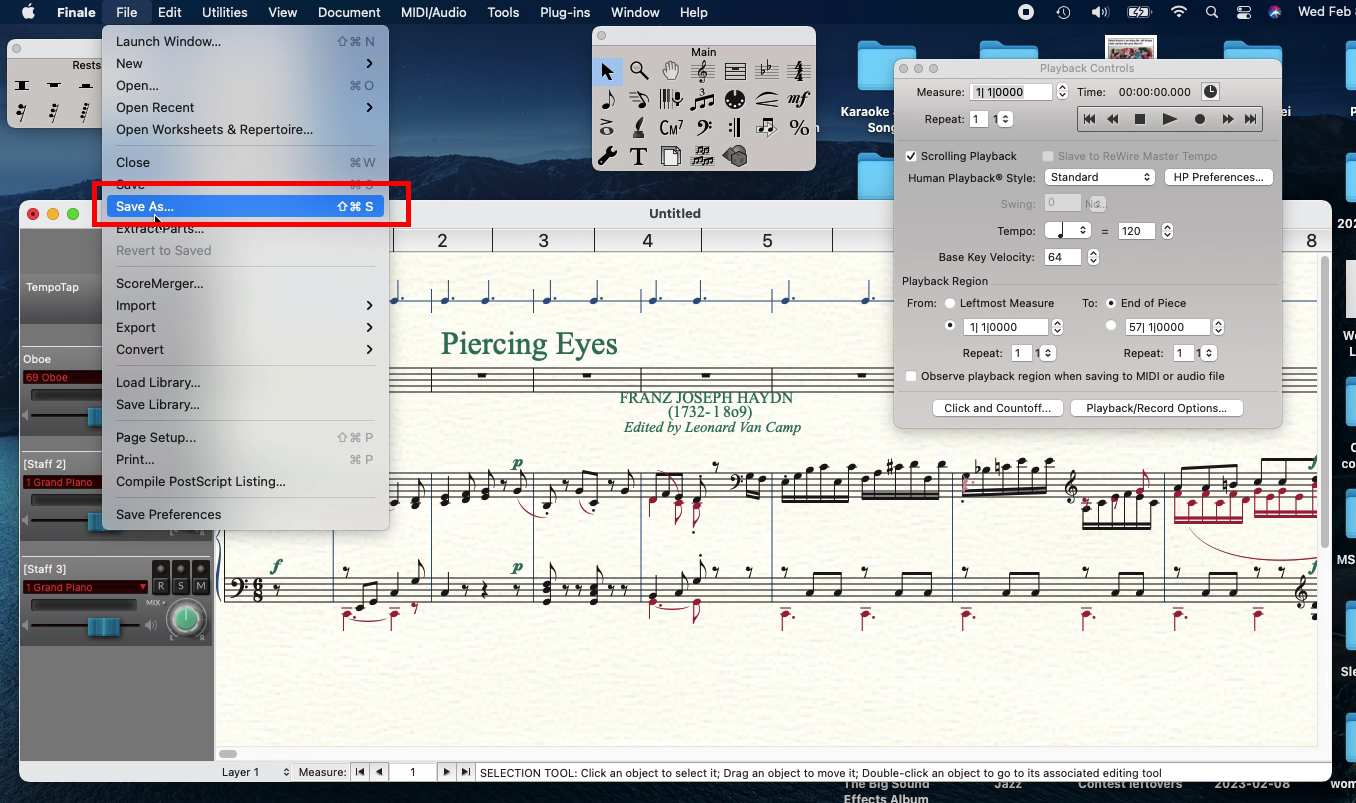
 Save As... routinely to save your changes as you proceed.
